Crafting your own copper still is not only a way to produce bespoke spirits, but it also endows your home distilling setup with a distinctive aesthetic appeal.
Here’s a step-by-step guide to help you build your own copper still. It’ll tell you exactly what materials you need and how to put them together to create your very own still.
Materials Needed
Before embarking on your copper still project, it’s essential to gather all the materials you will need. Here is a comprehensive list of things you can do for a start:
- Copper sheet (22-gauge is recommended)
- Flux
- Solder
- Lead-free soldering iron
- Blowtorch
- Tin snips
- Metal file
- Tungsten carbide drill bit
- Hammer
- Anvil
- Rivets
- Metal punch
- Glass jar
- Water
- Distilling ingredients (fruits, grains, etc.)
Choosing the Right Copper Sheet
The cornerstone of your copper still will be the copper sheet. Crucial to the durability and malleability of your still is choosing the right gauge. A 22-gauge copper sheet strikes a good balance and is widely recommended. Copper sheets can be sourced from your local hardware store or via online suppliers.
Gathering Additional Tools and Materials
In addition to the copper, you’ll need a collection of tools for cutting, shaping, and joining the metal. Ensure you have a reliable blowtorch for heating the copper, a soldering iron for joining pieces, and a drill bit for making precise holes. During the construction process, every tool is absolutely crucial.
Preparing the Workspace
Safety and precision are paramount when working with metal and heat. Prepare a workspace that is well-ventilated, free from flammable materials, and equipped with a sturdy table. Make sure to have all your tools within easy reach to maintain an efficient workflow.
The Manufacturing Process
Equipped with the necessary materials, you’re now ready to delve into the intricacies of creating your copper still. You can specifically follow the steps below to make one.
Step 1: Create the Base
Begin by cutting a large rectangle from your copper sheet to form the base of the still. It should be sufficiently sized to accommodate the dimensions of the still you envision. Subsequently, employ your metal file to deburr and smooth the edges, ensuring a neat finish.
Step 2: Create the Walls
Proceed to cut two additional large rectangles for the walls. They need to be tall enough to form a cylinder when bent into shape. Create a notch near each corner to facilitate the overlapping of edges, which will later be sealed to prevent vapor escape.
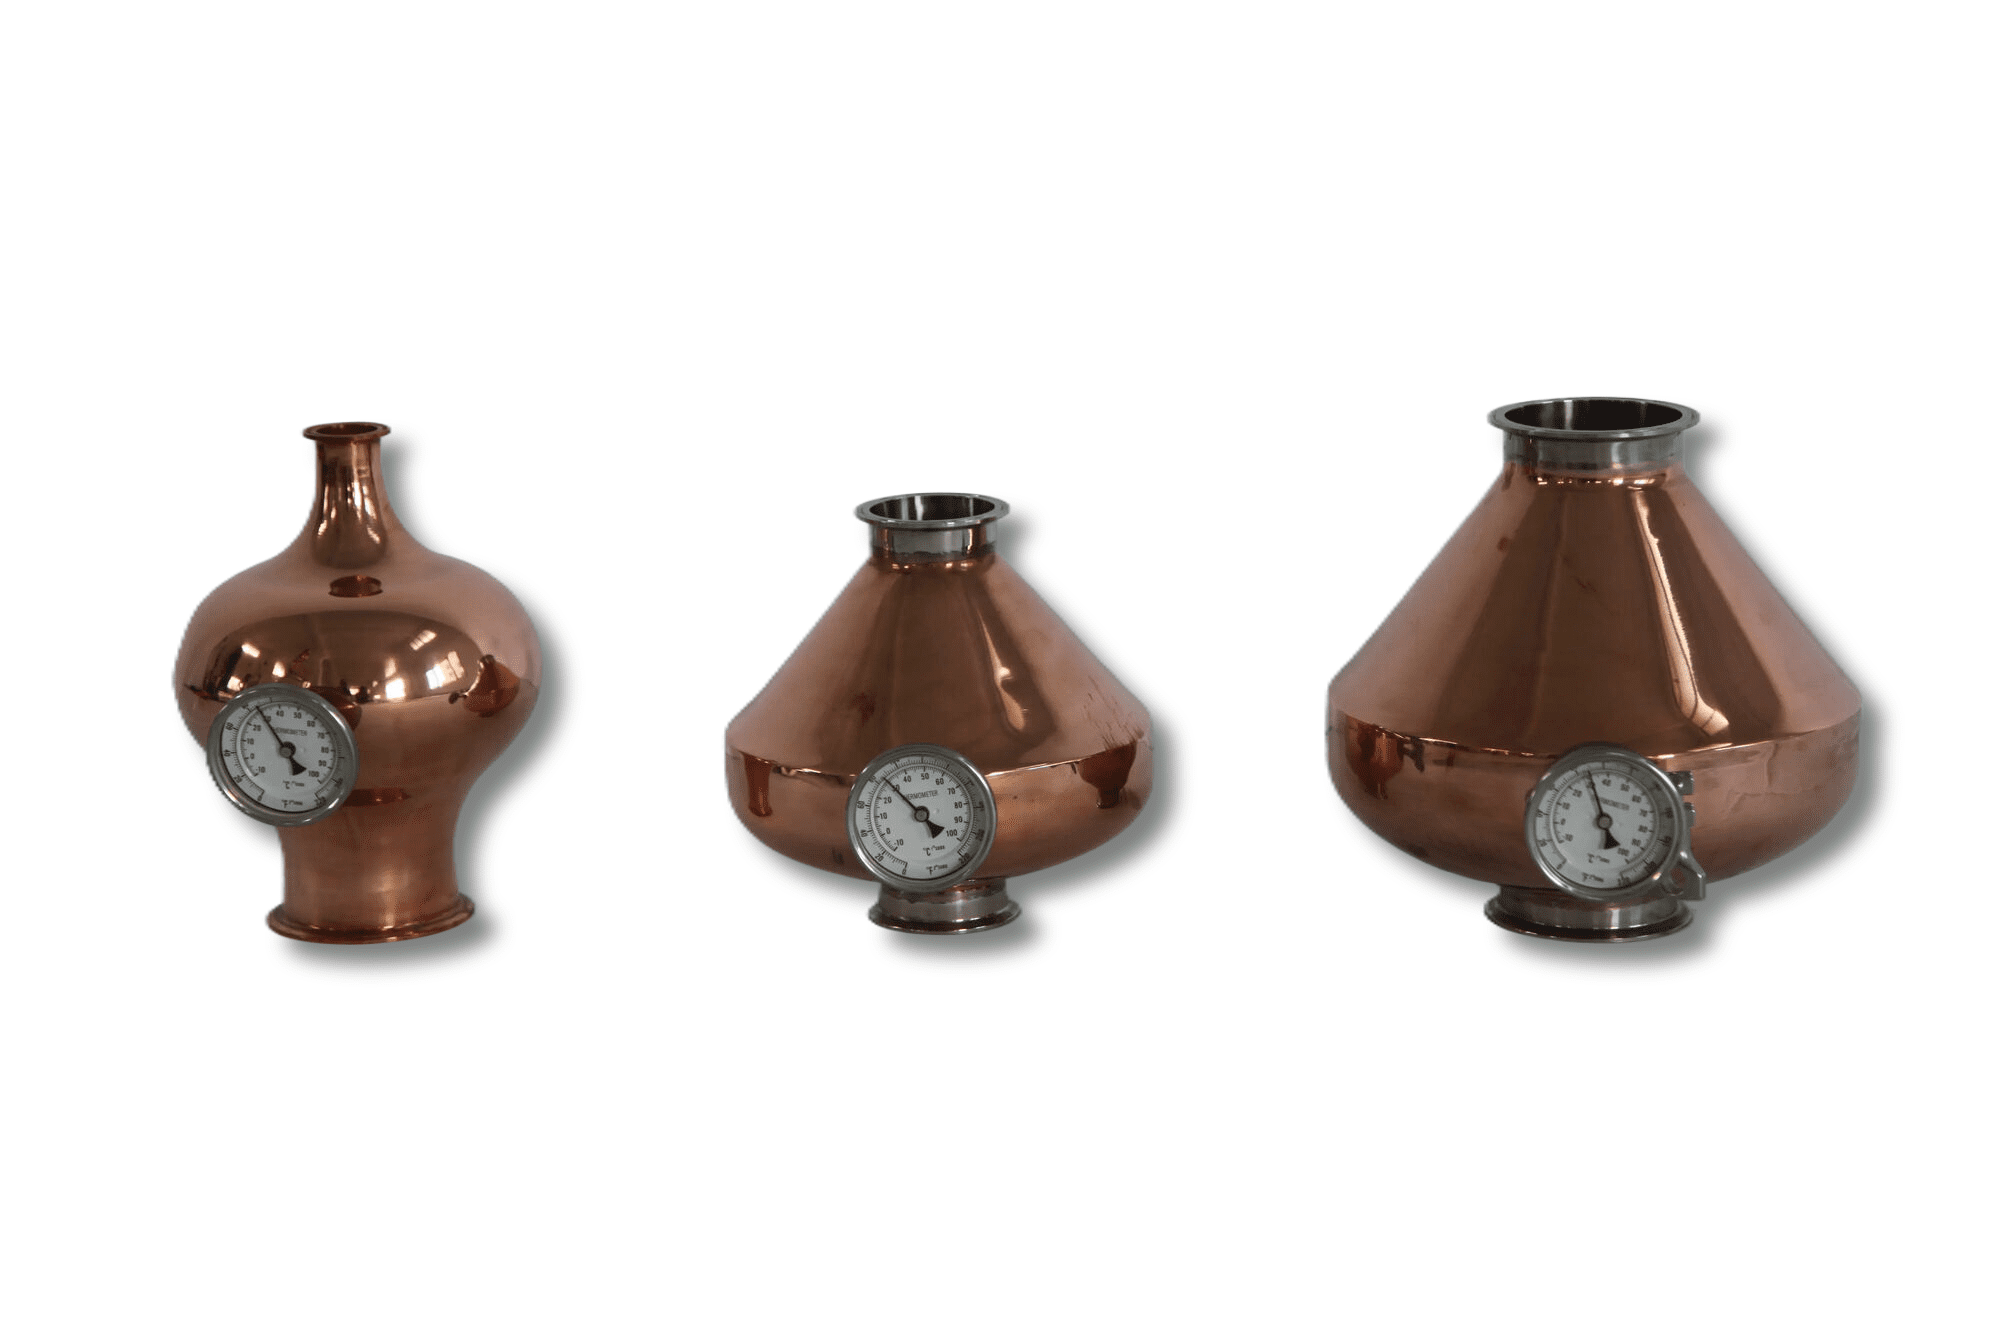
Step 3: Create the Top
Fashion a circular piece from the copper sheet to serve as the top of your still. The diameter should exceed that of the walls to ensure a proper fit. This piece will eventually be joined to the walls to complete the main chamber of the still.
Step 4: Assemble the Pieces
Position the base and walls on a level surface, then apply heat with your blowtorch to soften the copper, making it more pliable. Bend the walls at the notches and unite them with the base using a hammer and anvil. Afterward, place the top onto the walls and fasten it using rivets to secure the assembly.
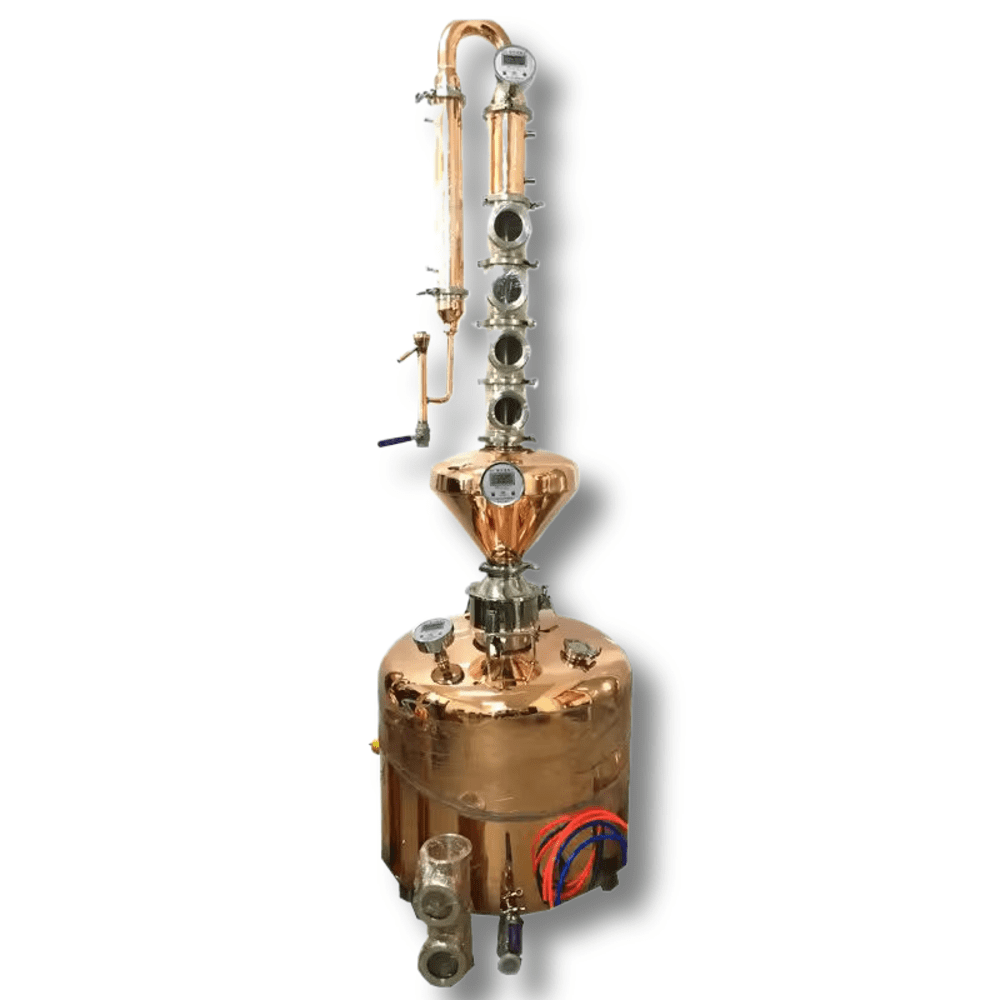
Step 5: Create the Condenser
Crafting the condenser is a critical stage. Shape a small copper sheet into a conical form for the top of the condenser. Drill a hole at the base to allow the passage of vapor. Fit this cone over a glass jar, which will be filled with water to cool and condense the vapor, and secure the structure with rivets.
Step 6: Solder the Seams
Meticulously solder all seams using flux and solder to ensure a hermetic seal, which is vital for the still’s functionality. Employ a lead-free soldering iron to prevent the introduction of hazardous substances into your distilled products.
Step 7: Install the Spout and Attachments
After the main body is assembled, focus on installing the spout through which the distilled spirits will be collected. Attach any other components, like temperature gauges or sampling ports, that you may require for monitoring the distillation process.
Step 8: Test Your Still
With your still assembled, it’s time for the moment of truth. Load it with your chosen distilling ingredients and apply heat. As the concoction warms, vapor will ascend through the condenser and liquefy in the jar. Once the process concludes, you’ll have your distilled spirit ready for enjoyment.
Safety Precautions
When engaging with metalwork and heat sources, adhering to safety measures is of utmost importance. Here are some additional tips to maintain a safe environment:
Protective Gear and Safety Equipment
Always don protective gloves and safety glasses to shield yourself from hot metal and potential sparks. A well-equipped first-aid kit should be on hand for any minor incidents.
Ventilation and Fume Management
Ensure your workspace is properly ventilated to dispel any harmful fumes that may arise during soldering or when heating the copper. Consider using fans or an extraction system to maintain air quality.
Fire Safety and Emergency Preparedness
Keep a fire extinguisher within easy reach and familiarize yourself with its operation. It’s also sensible to have an emergency plan in case of an unforeseen fire or accident.
Make a Copper Still Video
Conclusion
The construction of your own copper still is not only a perfect blend of skill and functionality, but also a unique addition to your home. You can create a durable and functional copper still that will last for years to come by following the detailed steps in this guide. As you embark on this creative journey, enjoy the fruits of your labor. Raise a glass to your distilling success!
If you need to buy a complete copper stills please visit our catalog.